Carl & Rafael's RV 14A Builders Site
  • Home
  • Aiken Airport KAIK
  • Previous Builds
  • Carl's RV 7A
  • Rafael's RV 12
  • About the RV 14
    • RV 14A Specifications
    • RV 14A Performance
  • Work Shop
  • Empennage
    • Kit Delivery
    • Vertical Stabilizer - Sec. 1 thru 6
    • Rudder - Sec. 7
    • Stabilizer - Sec. 8
    • Elevator - Sec. 9
    • Rear Fuselage - Sec. 10 thru 12
  • Wings
    • Kit Delivery
    • Spars - Sec. 13
    • Main Wing Parts - Sec. 14
    • Ribs - Sec. 14
    • Wing Assembly - Sec. 14 Thru 17
    • Fuel Tanks - Sec. 18
    • Bottom Wing Skins - Sec. 20
    • Flaps - Sec. 21
    • Ailerons - Sec. 22
    • Aileron Control System - Sec. 23
    • Wing Tips - Sec. 24
    • Aileron Trim - Optional
  • Fuselage
    • Kit Delivery
    • Mid Fuse Bulkheads - Sec. 25
    • Mid Fuse Lower Structure - Sec. 26
    • Firewall - Sec. 27
    • Fwd Fuse Lower Structure - Sec. 28
    • Fwd Mid Fuse Side Structure - Sec. 29
    • Aft Fuselage Attach - Sec. 30
    • Fuel System - Sec. 31
    • Baggage Area - Sec. 32
    • Interior Painting - End Sec. 32
    • Rudder and Brake Systems - Sec. 33
    • Flap Actuation System - Sec. 34
    • Upper Fwd Fuselage - Sec. 35
    • Aileron & Elevator Systems - Sec. 36
    • Roll Over Structure - Sec. 37
  • Finishing Kit
    • Finishing Kit Delivery
    • Canopy and Window - Sec. 38
    • Seat-backs - Sec. 39
    • Landing Gear and Engine Mount - Sec. 40A
    • Wing Attachment - Sec. 41
    • Miscellanea - Sec. 42
    • Engine & Propeller Delivery
    • Engine Installation - Sec. 43
    • Spinner & Propeller - Sec. 44
    • Cowling - Sec. 45
    • Tricycle Gear Legs & Fairings - Sec. 46A
  • Firewall Forward
    • Engine Specifications
    • Cowl Baffle - Sec. 47
    • Exhaust System - Sec 48
    • Fuel & Oil Systems - Sec. 49
    • Control Cables - Sec. 50
    • Firewall Forward Misc. - Sec. 51
  • Panel & Instrumentation
    • Panel
    • Wiring & Equipment
    • Sensors
    • Avionics
    • Landing Lights - OP52
  • Move to KAIK & Final Ass'y
    • Empennage Installation
    • Wing Installation
    • Odds and Ends
  • Fiberglass & Body work
  • Weight & Balance
  • FAA Inspection & First Flight
  • Phase I & Changes
  • Interiors
  • Paint Design & Painting
    • Scheme Designers
    • Glo Custom
  • RV Builders Forum
  • RV 14 Builder Sites
  • Builder's Location
  • Closing Thoughts
  • Picture Page

Aileron Control Systems - Section 23

Picture
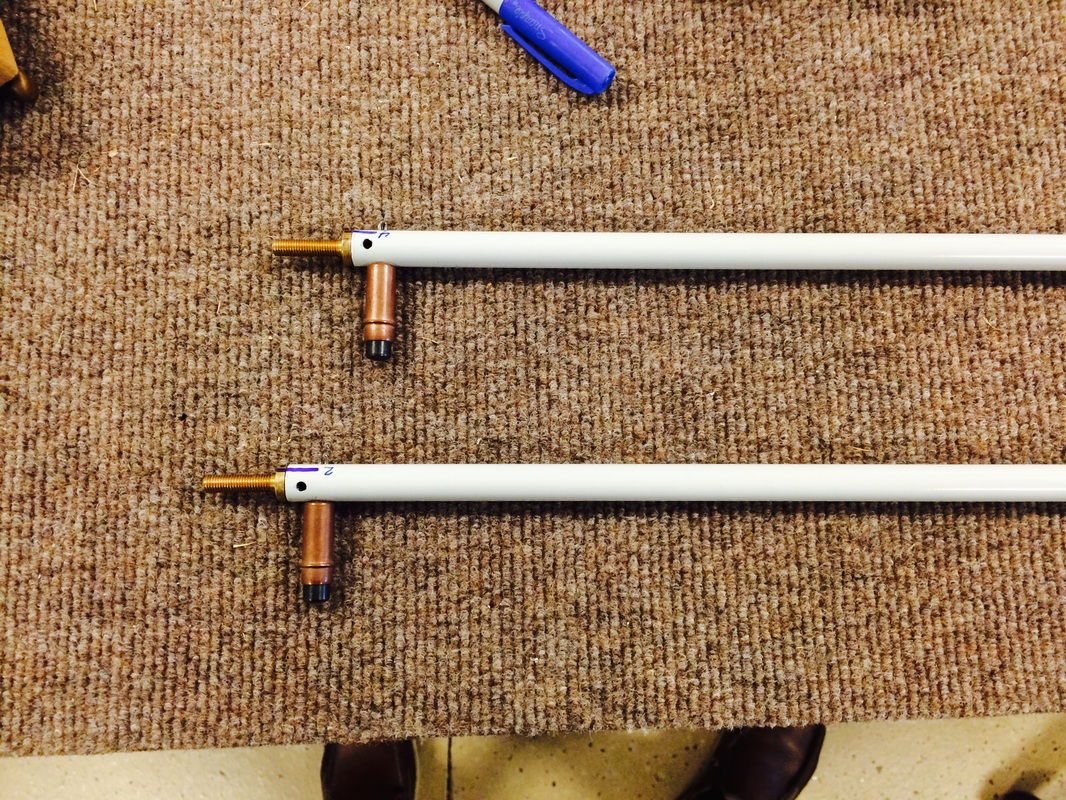
These are the bell crank to aileron push rods. Already powder coated by Vans, the threaded ends get drilled and installed with 2 long AN470D4-11 rivets sequentially squeezed to keep them from bending over.
Picture
The flap attachment arms shown with the bushings squeezed into place. This was accomplished with a C clamp and a socket on the back side. Ingenious and shown "how to do" this in the plans
Picture
Jury tubes after the jigging process ann drilling, ready for priming
Picture
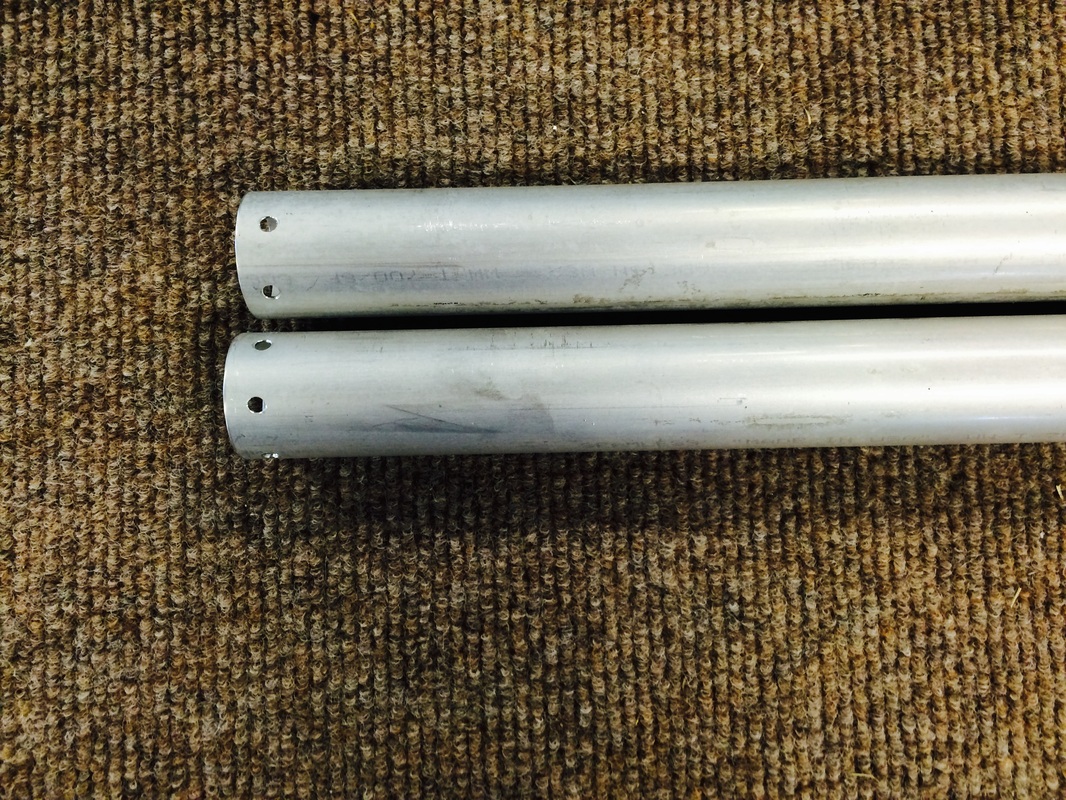
This tubes are for the ailerons from the torque tube assembly to the aileron belcrank
Picture
All these tubes are being readied for priming the interior with AKZO. We tape one end, pour in the primer, let it sit for a minute or two, the pour it back in to the mixing cup.
Picture
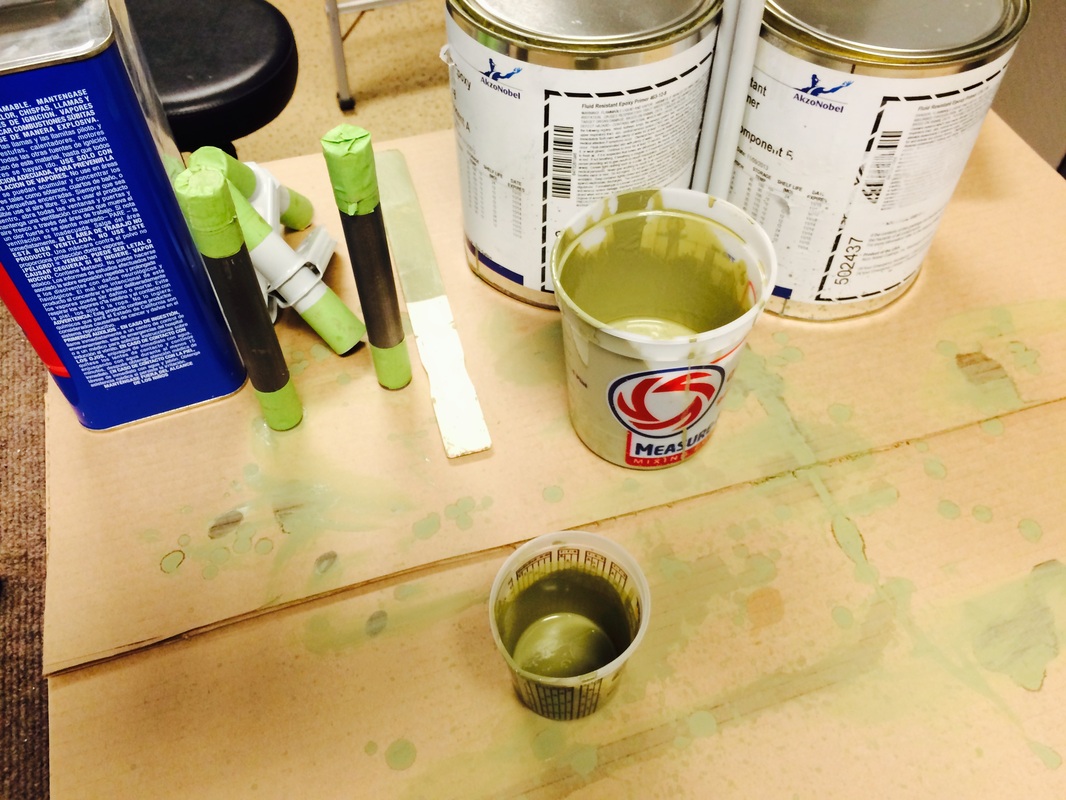
Required supplies during the priming process
Picture
Allowing the push tubes to drain the primer into the trash. Most of it has already been drained back into the paint cup.
Picture
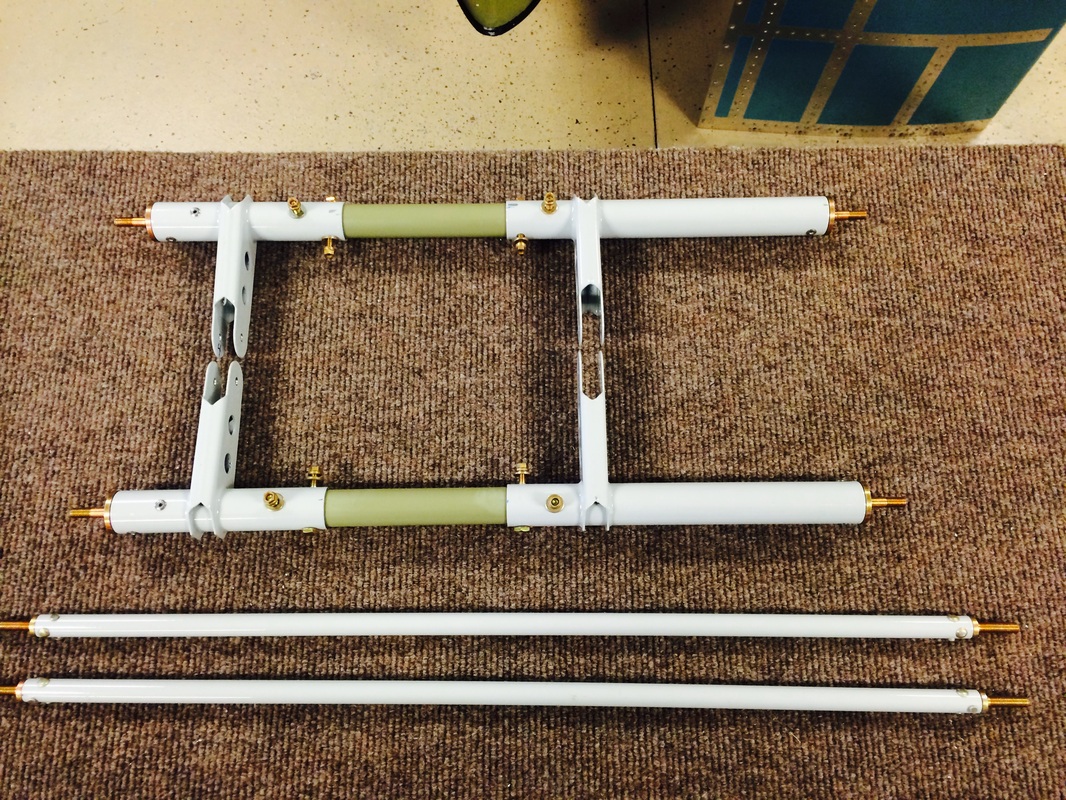
Torque tubes and push rods after completion
Picture
We still need to paint the ends of these push tubes the next time we pull out the primer
Picture
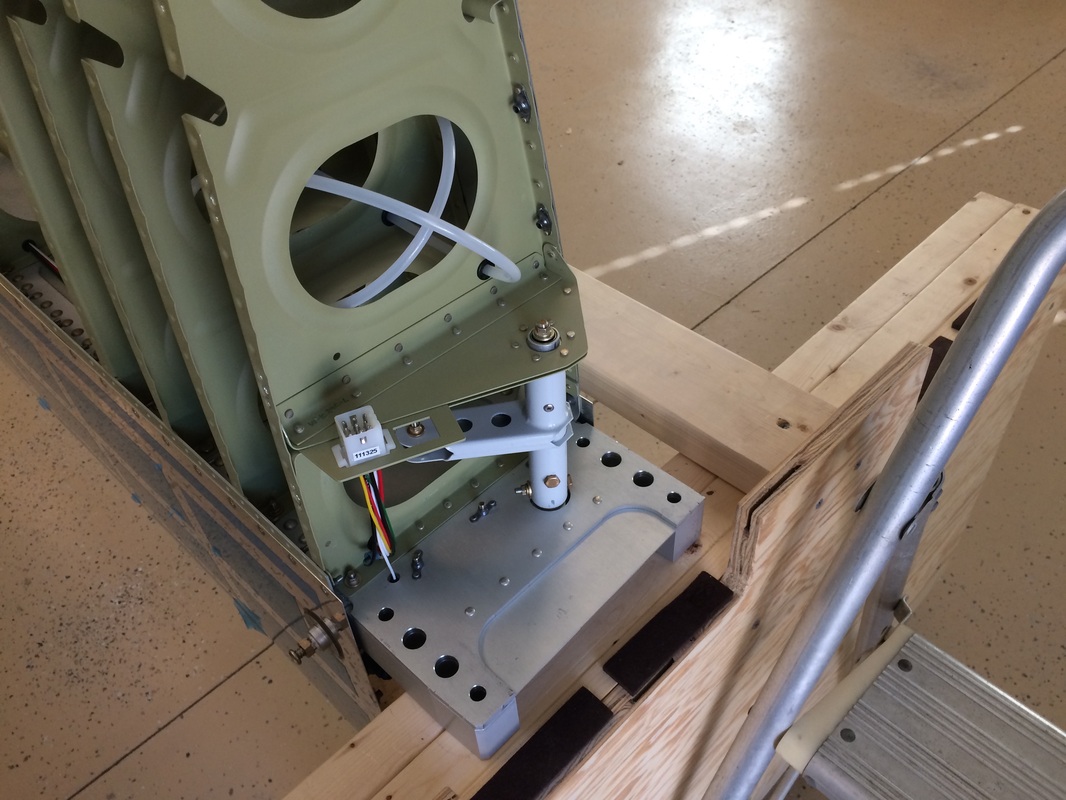
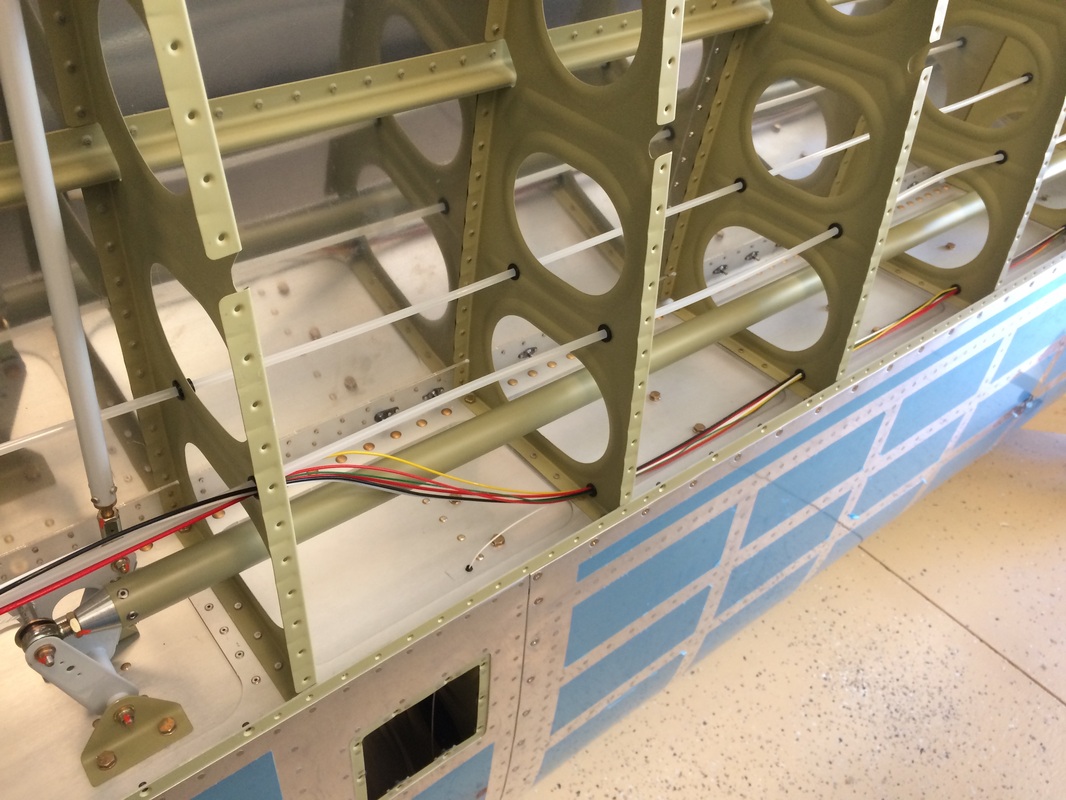
Today we installed and rigged the wing push rods. Vans sends a jig with the kit to lock the aileron bell crank and then you adjust the pushrods to set measurements noted in the plans. Nice, efficient and accurate, how can you beat that.
Picture
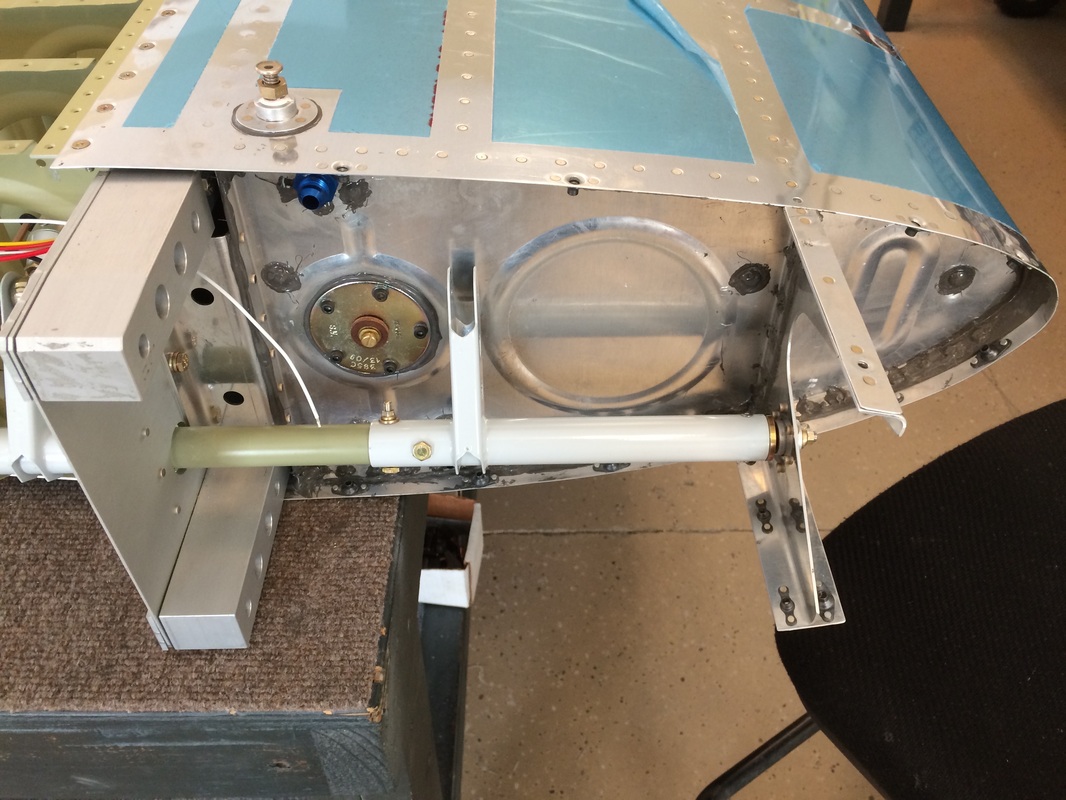
This is a shot of the aileron bell crank with the pushrods attached, torqued and marked with inspection lacquer.
Picture
This view is the pushrod that attaches to the aileron, with the length set during the rigging process while the aileron was in place. We tied it off to keep the pushrod from moving around.
Picture
Powered by Create your own unique website with customizable templates.